Category Archives: How-Tos

Super Delicious Almond Milk Recipe + Fun Before & After Pics

Standard

As I’ve mentioned before, there are several instances where I have to improvise on a recipe because I don’t have enough of a specific ingredient (or also just because I feel like it). I accidentally discovered this “almond” milk recipe one day because I didn’t have enough almonds. Technically it’s actually a nut milk recipe, but either way it still tastes like almond milk, just an extra delicious version.

So why is this almond milk recipe so special you ask? Because it is made with cashews and is sooo creamy and thick. I’m not sure if I’m the only one but one thing I miss when drinking typical almond milk is the creaminess of cows milk- with this milk you won’t miss it, I promise! I recently tried the original recipe without adding the cashews and it was then that I realized what a difference they made. Thus I was prompted to post this recipe to share the creamy goodness.
Here’s what you’ll need:

1 cup almonds
1/2 cup cashews
4 cups filtered water
blender
nut milk bag (I use this one sold at Whole Foods or you can use a fine mesh strainer)

optional for an extra special treat:
1 tsp PURE vanilla extract
1 tbsp grade B maple syrup or raw honey

Step 1:
Soak nuts in water for at least 8 hours or overnight in the fridge. I always do it overnight that way in the morning it just takes 5 minutes or less to have your milk ready. You can combine them into one jar, I just had them soaking separately for a different use.

Step 2:
Drain nuts and add to blender with 4 cups of filtered water. If you are adding the optional ingredients, add them now as well. Blend for about a minute.

Step 3:
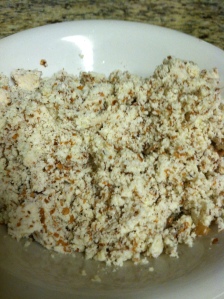
Pour mixture into nut milk bag over your choice of jar/container (preferable glass) and squeeze the bag to “milk” the almonds (or if using a strainer press with a spoon) until you are left with just almond meal like this (look out for a post tomorrow on what you can do with it):

Step 4:
Enjoy your delicious creamy almond milk! Cover and store whatever you don’t immediately devour in the fridge- it’ll keep good for about 3-5 days.

Oh and as promised, here are the before and after pics. I found the before pics last night on hubby’s computer and couldn’t resist sharing the progress. It has really motivated me to keep going to lose those last 19 pounds.

How to Eat Grapes (ever so cutely)

Standard

Grapes are such a hit right now with little miss Sunshine. Green, red, black, it doesn’t matter. I think she got me hooked on the black grapes though. They’re terribly delicious and addicting. These pics were too cute to not share. Hope you enjoy!

P.S. Don’t forget to always buy organic grapes. They rank #7 on the Dirty Dozen and you DO NOT want to put that crap into your body 🙂

This slideshow requires JavaScript.

How to Bake Spaghetti Squash

Standard

Little Sunshine LOVES spaghetti. Put a bunch of delicious foods in front of her and it won’t matter if there is pasta in sight. Lucky for me she does not discriminate and will eat whole wheat, spelt or brown rice pasta. However, since I am continually trying to up her veggie intake, I have been searching for ways to sneak those veggies in all the while letting her enjoy her food. I tried making pasta out of zucchini (post will follow in the near future) and it worked okay, I intend to try some sweet potato “pasta” as well (definitely expect a post on this one!) but for the mean time, I have discovered that spaghetti squash is our best friend. I can add chard pesto to this topped with some grated grass fed cheese, or even a little bit of my homemade roasted tomato and butternut squash spaghetti sauce sprinkled with some grass fed ground beef. If you want a super simple dish, just top this with a little bit of coconut oil, some sea salt and a sprinkle of parsley. Either way, it is so good! If spaghetti squash can fool a carb loving 17 month old I am sure it can fool many. A little note though, spaghetti squash reminds me much more of vermicelli or rice noodles rather than actual “spaghetti”.

I have found organic spaghetti squash year round at both Whole Foods and our local Central Market. This week though, we got lucky because they were available at the farmer’s market for only $1.50/lb! Rae of Sunshine picked this pretty baby out herself and it cost us around $3.

Now for the How-To:

Preheat oven to 400°
Stab the squash with a knife a few times in different spots to avoid cracking
Place in a baking dish
Let cook for about an hour (will vary depending on the size of your squash)
Remove from oven and let it cool for a bit
Cut in half


Remove seeds
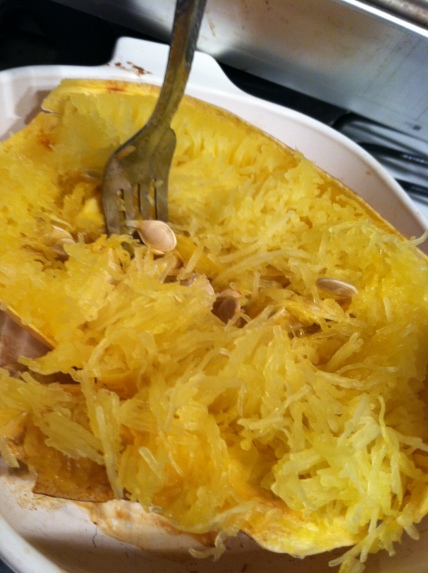
Begin scraping up and down with a fork; before your eyes you will see your “spaghetti” forming
The more you pull with the fork and separate the more noodle-like it will be
There you have it! Enjoy like you would any other pasta

Here is how we had it for lunch today:

How to Tolerate Beets (Oh and guess what?! You get a picture with this one as promised!)

Standard

Okay so truth is, I never had tasted beets until just a few months ago, but I LOVE them. So I do not have to just tolerate them. My family on the other hand, as I’m sure you might have gathered, really have no care for them. My sister once told me she could tell I was making beets because it smelled like dirt “just how they taste” she claimed. Well this method of cooking them changed her mind. And the recipe/combination following even had my mom convinced they weren’t so bad after all. So whether you are a beet lover or a beet hater, I encourage you to try it.

Cooking the beets:

start a pot of boiling water
take desired amount of beets and cut off the beet greens just above the top of the beet (in other words be sure not to cut into the beet or it will leak juice during the cooking process). Save those beet greens for another recipe (use like chard or other leafy greens) or a smoothie, yum! Leave the “tail” on the beet.
put beets into boiling water and boil until a fork can easily puncture (this may take 15-30 minutes or so depending on size of the beet)
remove from boiling water (carefully!) and run under cold water to easily peel the beet
slice beet and sprinkle with a little bit of sea salt, pepper, and some grass fed butter if you’re feeling extra special
Enjoy just like this, or use them in the following salad

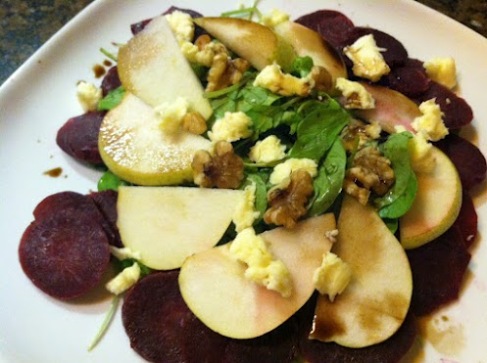
Arugula, Beet and Pear Salad

1 large handful of arugula
1 medium size beet from the “recipe” above
1 small pear (Anjou or Bartlett), sliced
small handful of chopped walnuts
few bits of fresh mozzarella made from grass fed cows milk (optional)
drizzle of balsamic vinagarette

Combine all ingredients on a plate or bowl and have yourself one DELICIOUS and nutritious salad

Image